Thanks to Apple’s new HomeKit home automation system and the versatility of Siri, the iOS digital assistant, you can now combine the two with HomeKit-enabled lights and control your home lighting with your voice. Read on as we demonstrate with Philips’ new HomeKit-enabled Hue system.
Why Do I Want To Do This?
Should you necessarily run out and buy an iPhone, a new Hue kit or other HomeKit light system, and potentially an Apple Watch all so you can control your lights with your voice from your phone or wrist? Nobody needs voice-controlled lights to live but it is the 21st century and if you already have an iPhone with Siri on hand then it’s not exactly a big leap to go from old fashioned flipping-the-switch to new-fangled issuing commands.
While smart bulbs in general, let alone voice-controlled smart bulbs, aren’t a necessity we can tell you that using smart bulbs and then adding in voice control to our smart bulb system has completely changed the way we light our home and interact with our lighting system. Lighting arrangements that simply didn’t exist in our old lighting paradigm, such as dimming all the bulbs on an entire floor to a soft romantic level or switching all the bulbs in a room to the perfect brightness of TV watching or reading, are now as simple as issuing a command to our phone or watch.
If you’re using the Apple Watch or the new iPhone 6 or above (both of which have the “Hey Siri,” voice activation prompt) you don’t even need to touch your device. More than once we’ve shut down all the lights in the house by just saying, before bed, “Hey Siri, turn all the lights off” and, like we’re living on The Jetsons, it just works.
What Do I Need?
In order to control your home lighting you need a handful of things. First and foremost, you need an iOS device that both runs Siri and is updated to at least iOS 8.1 or above for HomeKit support. This rules out iPhones older than the iPhone 4S, iPod Touch models older than the 5th generation, and 1st generation iPads. All other iOS products are compatible with iOS 8.1 (and as of this writing can all upgrade to at least iOS 9).
In addition to an appropriately updated iOS device with Siri and HomeKit you also need a HomeKit-enabled light system. For demonstration purposes we are using the Philips Hue 2.0 system (which features an updated bridge that supports HomeKit).
Note: If you were a Hue early adopter you can keep your existing Hue bulbs but you will need to upgrade your Hue 1.0 bridge to a 2.0 bridge. You can read more about the new Hue Bridge and the discount promotion Philips is running for Hue 1.0 bridge owners here.
You can also control other HomeKit-enabled light systems like the new offerings from Lutron (the Caséta Wireless Lights system) and Insteon’s new Hub Pro (which links your Insteon lights to the HomeKit system). While these systems all offer diverse lighting solutions the general process of linking them and using voice control is the same.
Setting It Up
Setup will vary between each HomeKit lighting product so we will leave plugging everything in and performing the basic configuration and pairing between the smart bulbs and the bridge to the reader. Once you have your system physically installed, however, there is an extra step you must carry out using your controlling iOS device and and the application for your particular lighting system.
It’s important to note that when we say controlling iOS device we mean the device in your household that the owner/parent/person in control of the home automation stuff uses and is logged into. Why does that matter? HomeKit is linked to your iCloud login. As such you wouldn’t want to use your child’s iPad to set up your HomeKit settings (if that child has their own iCloud ID) because then you’d always need to return to their iPad to make changes and you would have to share their HomeKit configuration with your other devices (instead of you, the controlling agent, sharing the HomeKit setup with them). If you do accidentally set up your HomeKit system under the wrong Cloud ID don’t panic, simply reset the HomeKit configuration on the device you erroneously used to setup your system.
That minor warning aside, linking a lighting system to HomeKit is very simple once you’ve already done the hard work of physically installing the lights. To link your light system you simply need to link the product to Siri/HomeKit. Depending on the particular application the menu item might say “Siri voice control”, “Siri”, “HomeKit Support” or some variation there of. Let’s look at the process with the Hue Bridge 2.0 to demonstrate.
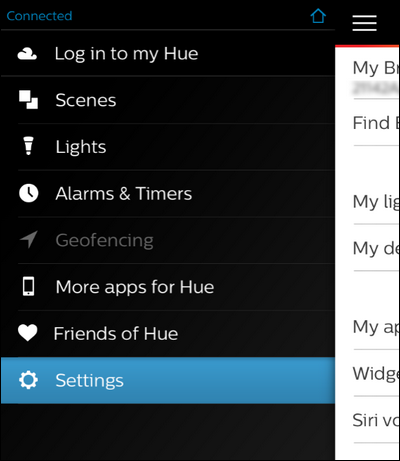
To link the Hue Bridge to HomeKit and enable Siri control you just open up the Hue app, tap the menu button in the upper left corner, and select “Settings” as seen in the screenshot above.
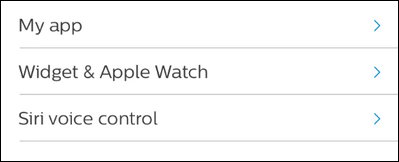
Select “Siri voice control”. The app will search for the Hue Bridge on your local network.

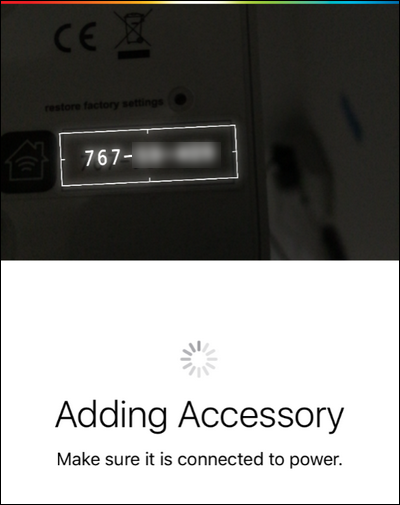
When it locates the bridge you will be prompted to either manually enter the HomeKit ID number on the physical bridge unit or to scan the bridge unit. We’d recommend scanning it, the scanner is really fast and accurate even though we were standing in a dark utility closet and didn’t even square up the image:
At that point all that’s left to do is to select the scenes and/or lights you wish to control via Siri, as seen in the image below:

Different HomeKit-enabled systems and apps will have different methods of selection but the general rule is that you can always select groupings (called scenes, rooms, or zones depending on how they are organized within the app) and/or individual components of the system like the separate light bulbs or fixtures.
Controlling Your Lights With Siri
Once you’ve gone through the hassle of setting up the physical system and jumped through the minor hoop of linking the Hue app to your HomeKit system, then it’s just a matter of kicking back and issuing commands to Siri.
Planning Your HomeKit Commands
Siri will parse out your commands in pretty natural language (although you don’t have to use full natural language for Siri to understand most commands). When paired with the Philips Hue system you can issues commands to turn on and off the entire lighting system, adjust the state, intensity, and color of individual bulbs (if you have the Hue bulbs and not the white-only Hue Lux bulbs that is), and activate the preprogrammed scenes you’ve shared between your Hue app and HomeKit. Let’s emphasize that last bit to save you frustration: remember the final step in the previous section was to select which scenes and which bulbs you wanted to add to HomeKit. If you failed to add a scene in that step then it won’t be available for Siri voice commands.
Now, one important note before we proceed, some names can be tricky for Siri because they are part of other common commands. Siri, for example, desperately wants to parse out names and dates into contact actions and calendar actions.
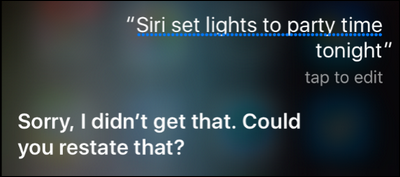
As such it’s just asking for a headache to name the bedroom lamp on your spouse’s side of the bed “Nicole Lamp” because half the time you say “Nicole” in a voice command Siri will want to do something related to Nicole’s contact information. The same goes for any words that sound like they’re related to calendar actions (today, tonight, Tuesday, you get the idea). Siri is way happier when your potential commands are very clear.
For example naming a scene in your lighting system, however playful or cute it might be, “Nicole Is Home” to indicate the mood lighting you turn on when your spouse comes home, is just asking for trouble as Nicole and Home are both triggers for different things within the Siri command-response universe. Conversely naming a scene “Movie Mode” or just “Movies” is a pretty safe scene name because it is very unlikely to cause any Siri-related confusion.
Commands Hue And HomeKit Understand
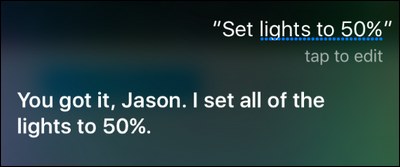
With that in mind you can use the following commands to communicate with Siri and your Philips Hue light system. The first set of commands are directly listed on the Philips web site and in the Hue documentation (and we confirmed them to work with our system):
- “Turn all lights [on/off]”
- “Turn [light name] [on/off]”
- “Set [scene name]
- ” Set lights to [X %] brightness”
We’ll admit that it’s rather curious there is so little documentation about the actual commands you can issue to the Hue system given what a huge upgrade it was for Philips to roll out a totally new bridge with HomeKit support. Some of the above commands, like the percent brightness command, aren’t even spelled out in the documentation; we saw it mentioned in their ad copy and we winged the command on our own and it worked.
Speaking of winging commands, here is are some additional commands we stumbled upon while playing around with the system:
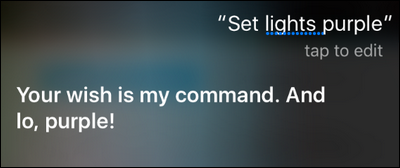
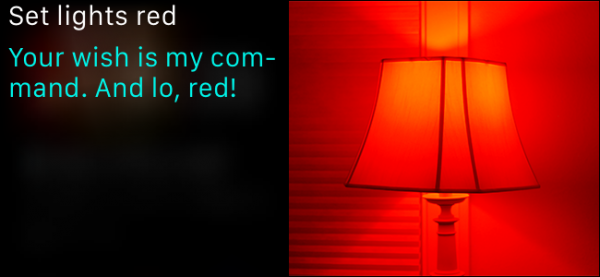
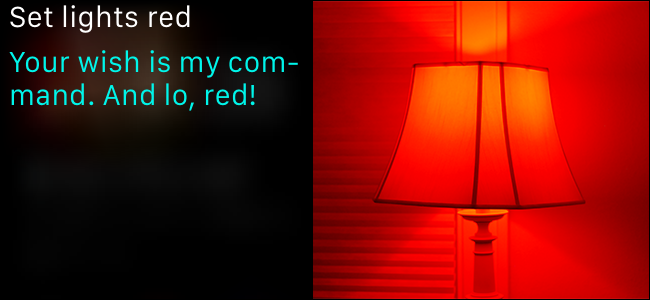
- “Set lights [color]” (Hue color bulbs only)
- “Set scene [scene name]” (adding “scene” to the command works well if you have a scene name that is tripping Siri up)
One thing you’ll notice missing from the list of commands available for the Hue is the ability to turn off a room or a zone (a very widely advertised HomeKit trick). The way HomeKit works the scenes, rooms, and zones are all determined by the application controlling the HomeKit equipment and not HomeKit itself. If your particular hardware vendor has an app with “rooms” in it then you can issue a command like “Turn off the bedroom lights”.
If your particular vendor does not have a room/zone system in their app, then you cannot issue a room/zone based command. In this regard you can’t use the Philips Hue app/HomeKit integration to issue the command “Turn off the bedroom lights” because it has no idea what the bedroom is, but other HomeKit solutions like the Lutron Caséta Wireless Lights system app do include room grouping.
We’d love to see Philips update their app to include said support but we’re otherwise very happy with the integration and still quite impressed by the ability to talk to our Apple Watch on the nightstand and turn all the lights off at the end of the day.